Saturday, August 16, 2014

Speed dating with the stars: the InstaSky image


The Stone Age of Astrophotography

Back in the 1970's and 1980's, astrophotographers were making extreme long exposures of the night sky on Kodak monochrome, spectroscopic emulsions, the 103aO/E/F series. A rather difficult emulsion, of which you had to wipe off the anti-halo layer, in the dark, with a piece of cotton, soaked in fixer. Sometimes disaster struck - and we have all seen it happen - when the photographer wiped away the emulsion instead, destroying hours of work. Later on we moved to Kodak TP2415 baked overnight, at 60 degrees, in a pressurized tank filled with forming gas. 'Hypering' prolonged the sensitivity of Kodak's fine grained emulsion. We could record many deep sky objects, especially through deep red filters. It was considered state of the art in those days. Glued to the cross hair eyepiece of a parallel mounted guidescope, we had to make sure never to let a tiny guide star slip away from dead center in the field, correcting our not-so-perfect equatorial mounts for hours in a row, in the freezing cold. One silly airplane could ruin hours of effort. There were lots of silly airplanes around.
90 minutes exposure through a Takahashi astrograph on hypered TP2415, back in the 90's.

Twenty years ago, digital CCD's made it into amateurs hands, leading in less than a decade to even more beautiful images of the night sky, driven by evolution of hardware and software. Guiding was no longer done manually. A guide camera or even a guide CCD mounted inside the camera got rid of that nuisance. Finally we could make shorter subframes, and handily relying on the linearity of a CCD (film just gets slower and slower the longer you expose, unlike a CCD), and added them together to create magnificent, technicolor images of the deep sky. If one frame was ruined by an airplane trail, we just dropped it from the stack. Color was obtained by imaging through red, green and blue filters and putting it all together in software. Fantastic technology, but not exactly cheap.
2 hour exposure using an SBIG CCD and RGB filters with Takahashi FSQ in 2006


New kid in town

Ten years ago, the digital SLR became widespread, and budget astrophotographers started to experiment with them to capture deep space photons. In the early days, the cameras captured more noise than there are sand grains in the Sahara, and the colors were often way off. Courtesy of a far red to IR blocking filter in front of the CCD or CMOS. The filter renders human subjects a nice natural skin tone instead of an ugly, deep red one. Unfortunately, as a side effect, it blocks an important wavelength for astronomy: the hydrogen alpha line, which gives many nebula their saturated, deep red color.

Clever astronomers dismantled secondhand DSLR camera's and removed the darn filter. It proved some serious progress. Finally the colors were more or less 'right'. But the noise issue remained, well, an issue. Real CCD camera's are cooled, to reduce the amount of noise building up in the image. DSLR's are not so cool, and they get less cool with every successive frame taken. People installed peltier cooling elements, used icepacks, whatever kept that chip as cold as possible.
Keeping the camera cold with icepacks!
Back in 2004, Philippe Vercoutter and I wrote an extensive e-book to DSLR astrophotography, with many documented experiments and tests of the DSLR cameras then available. You can still download it here, in Dutch only.

Fortunately, DSLRs are behaving much more astro friendly nowadays. Most vendors drive up the sensitivity and noise reduction capabilities to insane heights. You want 250.000 ISO? See what we have got for you! Now, 250.000 ISO may sound nice, but those extreme speeds are not really suitable. Far too noisy for the necessary extreme level stretching of astronomical pictures, and virtually no dynamic range left in the resulting image. But, they got really, really, really good in their lower ISO's, say up to ISO 1600 or even 3200. My Canon 6D produces an absolute minimum of noise grain, even now, in the moderately warm summer months.

Short is beautiful

The last few years have not only seen progress in DSLR technology. Telescopes, guiding mechanisms and software joined in to create a relatively cheap platform for some serious deep space photography. Fast Newtonians with correction lenses, apochromatic refractors, flatfield Schmidt-Cassegrain and Ritchey-Chrétien telescopes have seen their prices drop substantially by far east mass production, making them available to many amateurs.

All of this evolution seems to come together right now to allow for nearly Polaroïd like astrophotography. And instant and quality deep sky satisfaction is what we really want. Yihaa! We no longer want to use a cabling mess, take computer systems out  in the cold and moisture, add guide cameras and the needed guide system calibration, nor image through R, G, B filters. All this takes up lots of time. Time that I, and maybe you too, really want to use to grab more subjects. At least where I live, clear nights are scarce.

The InstaSky Image

This spring, I wondered what would be possible with my telescopes and a (blocking filter stripped) Canon 6D. I still had a modern, cooled SBIG CCD with a large filter wheel, but honestly, I just did not find the time, and worse, the motivation to use it. In the observatory I have a Takahashi FSQ106 ED refractor, with the dedicated reducer bringing it down to a fast f 3.75. On top sits a Celestron C8 Edge HD, also with a reducer for a resulting f 7 system. They are both mounted on a Chinese mount, the Skywatcher EQ8. Some serious mount, with excellent tracking and precision for a budget price. No way you could find something similar, just two years ago.

In July, I got everything ready to start with what I since call InstaSky's (as in Instagram): short exposures showing the deep space in nice color, to a larger audience, with acceptable to even good quality. Good enough to wow non-astronomers and get them interested in the night sky. To make the images, I just let the EQ8 track at sidereal speed, without any additional corrections nor guiding. The Canon 6D runs on its internal battery. No computer is used anymore. Since severe light pollution from nearby Ghent limits the exposure time for one single frame, I decided to standardize on a short, 60 second exposure, at ISO 800 (on the Takahashi) to ISO 2500 (on the Celestron). To block at least part of the pollution, I use an IDAS LPR filter. It prevents the sky from turning completely red in even a minute.

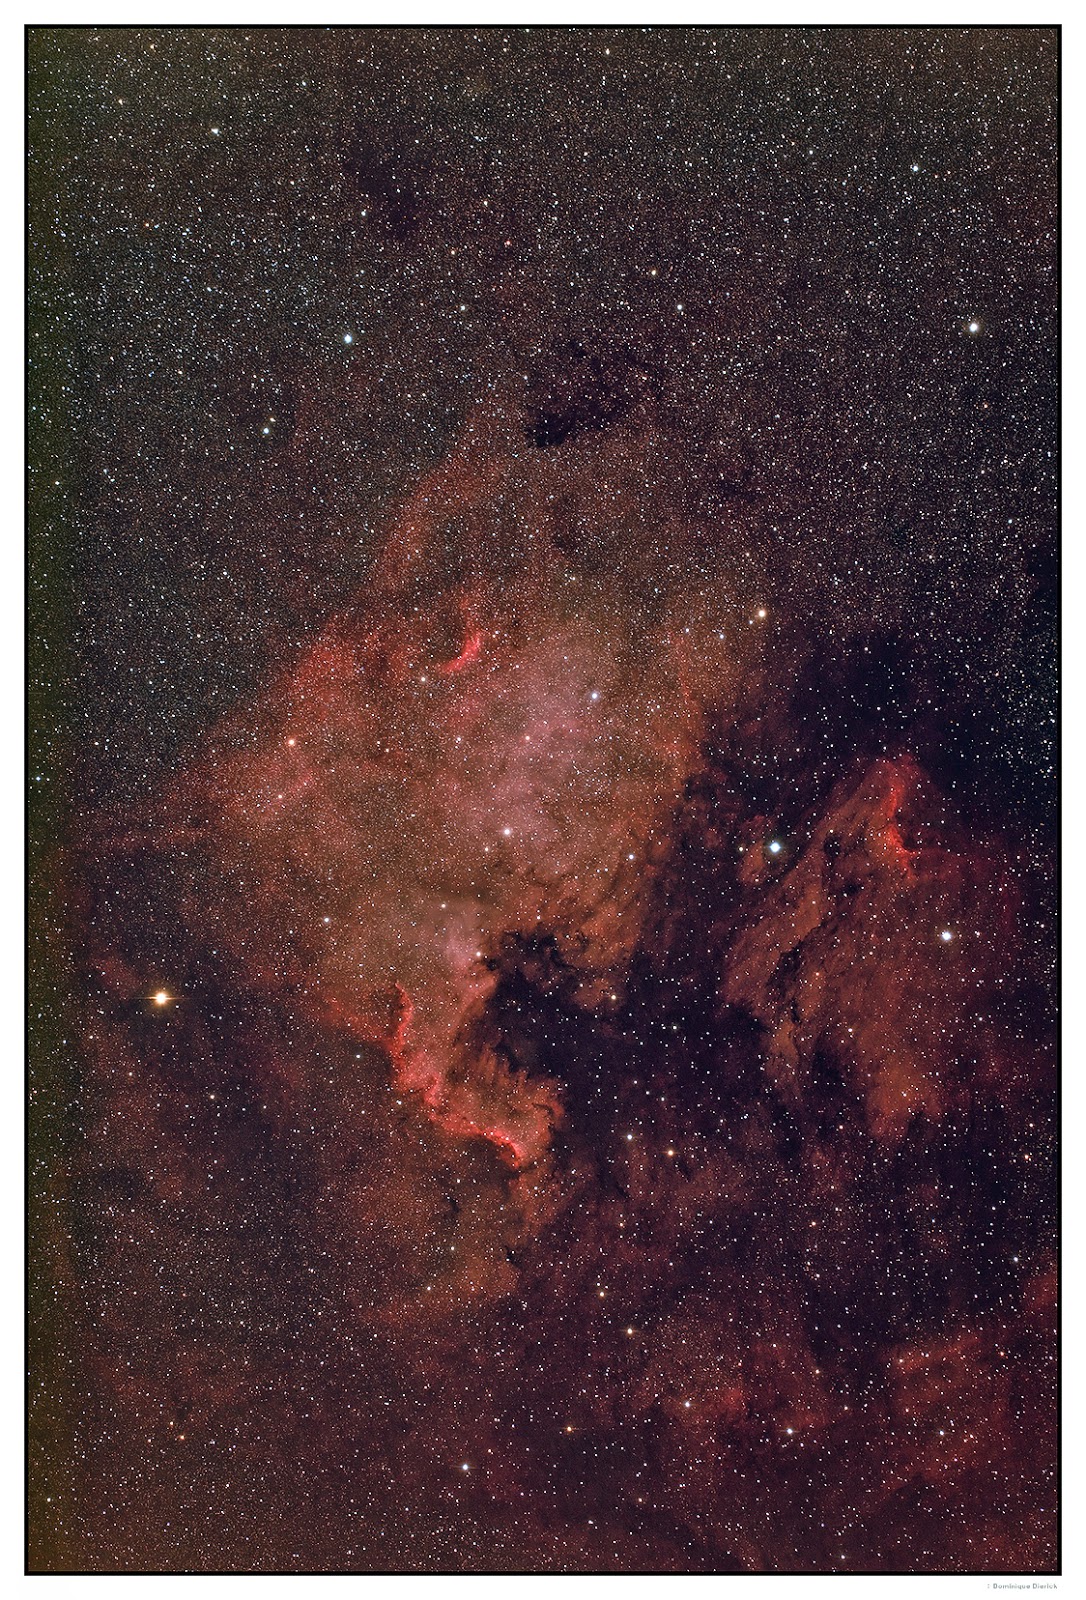
First Light, NGC 7000

Late July saw first light. The GOTO system of the EQ8 was targeted at NGC 7000, the North America Nebula in Cygnus. I focused on bright Deneb nearby, using the live view functionality of the Canon 6D - easy (and more forgiving than a CCD)! The external Canon interval timer was put to 60 seconds. I did not bother to take any darkframes (to reduce the noise) nor flat frames (to correct light fall off and dust specs in the optical system). The raw image was dropped into Adobe Photoshop CC and about a few seconds later I got this very first image with the Canon 6D after its modification.
It wowed me. I mean, seriously, this was done in just 6 0 seconds from a very mediocre site, with virtually no post-processing, just stretching the levels. I could have done a far better job in Photoshop, but that is not what I wanted to show here.

Of course, a more traditional approach of stacking different subframes together *will* produce a more pleasing result, but still: show this image to any bystander not into astronomy, within 2 minutes, taken at the telescope...

Since the sky remained clear, I programmed the Canon remote to make 60 images of 60 seconds, stacked them in Nebulosity 3.2 with darkframes, flatfields and bias frames. I did want to see the result of one hour of imaging from my site. This one was completely post processed, color corrected and contrast boosted in PS CC. The details in the large format of this image are really 'CCD' like and much more pronounced than in the single frame version. As expected. The stack of 60 frames, with calibration frames, offers much more headroom for post processing due to the higher signal to noise ratio.


Day Two: Sadr Region Cygnus

A couple of days later, conditions were fine again and I aimed the Takahashi at Sadr, a bright star in Cygnus. It is embedded in lots of hydrogen alpha nebulosity. Here is the InstaSky of that milky way region, in just 60 seconds.

Collecting 60 x 60 seconds, with additional post processing as with NGC 7000, rendered the image below.


Day 3: M52 and the Bubble Nebula

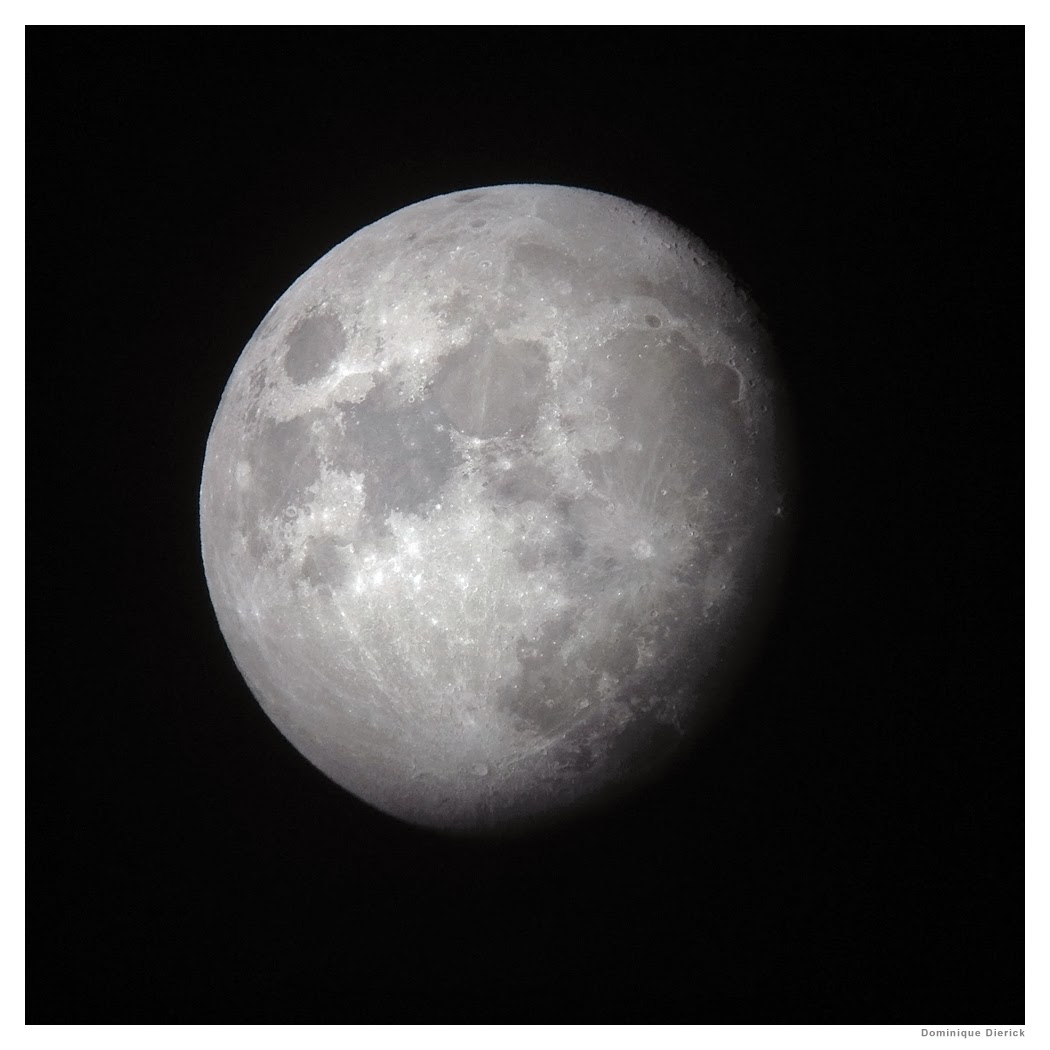
While perfecting the polar alignment of my EQ8 mount, I made another InstaSky. This time with the moon in the sky. I didn't bother to make a series of subframes of this object. Conditions were all but  great, and still, here's the result of 60 seconds. The Takahashi operated at its native focal length, without the reducer, at f 5.


Day 4: Planetary Nebula M27

Bottom line, InstaSky's were perfectly possible with my Takahashi refractor, which is a fast system with a relatively short focal length. How would it be with a larger system? In between the clouds, on an August night, the sky was very transparant. I knew a long series would not be possible, so InstaSky was again the way to go. This time I went for the Celestron C8 Edge HD, a Schmidt Cassegrain system, working at f 7 for 1400mm of focal length, and much more demanding. Nearly three times the focal length of the Takahashi, at least one or two stops slower. I reckoned, let's just crank the ISO up to 2500 and see what comes out of it...
 
The minute I saw the picture displayed on the Canon screen, I knew it would be a fine image. Again! The OIII and H-Alpha colors were sparkling, as were the star colors. It required very little post processing in Photoshop. I just did a contrast stretch, a slight noise reduction and enhanced the star colors. The image below is a downsized crop of the central part of the 6D. Unlike its larger brothers the C8 Edge HD is not fully corrected for the 35mm size chip of the 6D. It tops at the APS size format. But look at these colors and detail, and remember: still 60 seconds, still unguided, with a very modest telescope.


Conclusion: InstaSky Works

I had never hoped the above results to be possible. I am taking these images just 14km from the center of a large city, a city which blows *a lot* of artificial light into the night sky. The combination of fast equipment and the excellent Canon 6D really allows for nearly instant deep sky photography, something unimaginable just a couple of years ago. It makes it possible to show beautiful and colorful images of the deep space at public star parties in a couple of minutes. One could use one telescope to show the 'faint fuzzy' ("I can't see it") and the imaging scope to show how it would look if we had extremely sensitive eyes.

For the record: you can do all this with another brand of DSLR too. Just, Canon has the edge of historically being the camera of choice for this kind of photography, for a number of reasons (technical, software availability). As a result, it may be harder to find someone who can modify a Nikon for you (if you can't do it yourself). But even unmodified, you can still do nice things with either Canon or Nikon (or Sony, or Pentax).

Can the above images be better? Of course they can. Move to a darker sky (especially), make longer subexposures and they will be dramatically more impressive. Use a cooled, expensive CCD camera, and again they will be better. But likely at a much higher cost, with a lot more time, and without the fun of sharing the experience instantly with your neighbors and friends.

Wednesday, March 19, 2014

Mirrors by numbers


Last week I spent some time at the S9 building of Ghent University where the local Public Observatory Armand Pien found a temporary shelter during the renovation works on their observatory (located in another university building). The S9 building is also the home for a group of ATM, and the heart of the School Telescope project in Belgium and the Netherlands.
Jean-Pierre Grootaerd, one of the volunteers of the Amateur Telescope Making group showing a finished mirror. In the back is the vacuum chamber used to apply coatings to the mirrors.


Assisted by volunteers, students or schools can build their own Dobson telescope. Mirrors are usually somewhere in the 8 to 10 inch range, but larger instruments have materialized too. I was there on assignment for a Belgian newspaper. The article, pictures and video can (partly) be seen on the newspaper online site.

It's great to see over 60 scopes have been built in only three years time. The mirrors are ground and polished from fused layers of plate glass. Simple dobson mounts are used, but tracking platforms are now being offered as an add-on too.

As a matter of fact, with a good tracking platform, webcam astrophotography surely is within reach of dobsonian telescopes. Early March, under mediocre seeing, I could make a few webcam images of Jupiter and a nicely sharp image of the moon using a Skywatcher Flextube 12 inch GOTO scope. For the mount I used a 1.8x TMB barlow, for Jupiter a 3x Televue barlow with RGB and IR filters. The dual-axis tracking system worked like a charm for this kind of photography. Visually, Jupiter easily remains in the field of view for nearly an hour at high magnification. A dream for visual observation of the planets (and equally for deep-sky objects).


Tuesday, February 25, 2014

Move over darling!


Lucky shot this morning... The skies cleared just before sunrise to allow for a portrait of Venus chasing the moon out of the morning sky. I have seen them closer together, even Venus disappearing behind the moon, but it always makes a nice sight.

On national television weather forecast, it looked like this:


A little clockwork

Last monday I put to service the iOptron Sky Tracker. This little device will be used on trips to dark skies to make guided pictures of the sky. It comes with an excellent iOptron polar scope (an iOs/Android app to calculate the exact spot of Polaris for a given time and location can be downloaded for a low fee - but other apps do the same for free).

The iOptron app on iPhone
The most recent version of the Skytracker features an altitude adjusment wedge to help aligning the mount to the pole. It works, but is a little wiggly. Locking it requires some force, with enough risk to lose the just achieved alignment. Maybe the better idea remains to use a heavy duty geared tripod head with fine motion (Manfrotto has one), surely if you want to use lenses like the Canon 200mm 2.8 in my picture. Swapping lenses or camera accessories must be done with some care, not moving tripod or Sky Tracker. Double check polar alignment after any change in the configuration.

The iOptron provides two tracking rates: half sidereal to combine star motion with not yet too blurred landscape backgrounds, or full sidereal. The half speed is very handy, but with a 50mm lens on full frame DSLR stars looked trailed after one minute - which is quite as expected. For the image of Gemini below, I captured about 45 minutes of data (in 2 minute single frame exposure) with a Canon 6D and 50mm 1.4 lens from my backyard. None of the single frames had stars trailing. From what I saw during the stacking process single exposures of 10 minutes must be possible.

Jupiter in Gemini


Sunday, February 23, 2014

Too much confusion


OK, I did it. I just got me one of those new, advanced Skywatcher Flextube GOTO dobsonian telescopes. I mean, 12 inch full aperture, tracking and finding faint fuzzies in the sky without having to fall back to Olympic gymnastics was just too tempting to resist.

I picked it up at Astromarket.be in Nieuwpoort, near the Belgian coast (if you ever visit the town, I can recommend Boothuis, excellent food we got in that resto). Astromarket is led by Jim Oostvogels, a nice guy. Much nicer than the blokes from UPS who dropped one of the boxes with a bit of cosmetical damage to one side of the scopes' rockerbox. Oh well, Oostvogels ordered a replacement part for the non-critical component.
  

Jim is holding a 6 inch APM ED refractor here. Which is rather small and light. Left in the picture, you can see the boxes for the Skywatcher dobsonian. I mean, these are *huge*. We succeeded in putting the boxes in our car. Just.

Last night was partially clear, so I started the construction of the rocker box. People who buy their furniture at Ikea: mounting a dobsonian rocker box is more or less the same story. Skywatcher included the necessary tools, very Swedish for a Chinese company. No surprises here, everything worked out very well, and after an hour, I had a complete rockerbox, ready for use.


Make no mistake: a 12 inch Skywatcher Flextube Goto is heavy, and big. It allows for a one man operation, but not by a big margin. It might be a good idea to put it on wheels and roll it outside, especially in my case, after years of back problems. Luckily, Martine is willing to help till the wheels are ready.
Martine in the dunes, making a selfie video, wearing a kinda Mick Jagger coat.

I first tried working the telescope manually. But I did not like it, too much friction for a dobsonian, making push and overshoot happening too frequently. The telescope really is designed for automated operation and tracking. Which luckily is not too difficult to do: connect a cable between the two motors, add the keypad and a power cable and you are all set. The alignment procedure seemed to work fine. After entering local coordinates, time, time zone and daylight saving time, the scope was ready to align on two bright stars. This was enough to bring objects in the finder after a goto operation. Not in the center of the field of the main telescope as it should be expected, but I am not yet worried: the scope was not level at all, a prerequisite for more or less accurate goto's.
Did I mention collimating the optics was straightforward? It is, with the big knobs on the primary mirror cell. Optics kept collimation very well, even after sliding the secondary mirror cage to the primary one for storage.

Optically, the scope seems to perform well. Unfortunately, before I could really do an accurate startest (easy, because the dobsonian was tracking the star very well), clouds ended the show the first night.

Update: today the weather gods allowed me for one full hour of observing with the Skywatcher. I perfected the collimation and leveled the scope. Optics seem to be of excellent quality indeed. Visually I could see quite some detail around the Red Spot region on Jupiter, together with the pitch black dot from the shadow of one of the moons. The goto operations got a lot better too. Going from Betelgeuse to M35 in Gemini put the object in the field of view of a 20mm widefield eyepiece. Tracking was excellent and having a keypad to center objects is a blessing.

One thing I did not like so far. Both Celestron and Skywatcher use a Synta handcontroller with nearly identical keypad layout, from the same factory, but the functions of the controller are behind different buttons on the keypad. Why can't they keep this standard? Using a Celestron mount too, I often ended up pushing the wrong button, interrupting an alignment procedure, selecting a different menu than I expected. Too much confusion here. Hope they correct this, one day.

Finishing my blog for today, here are a few Jupiter images of last week. Seeing was good, and I got some nice detail with the 6 inch refractor. Not as much as I would have liked tho. I found the images to render less detail in the red channel, rather odd. Red is normally very good. Giving it some thought, I realized I had mounted the filter wheel backwards after the move to our new home. A quick test yesterday proved that just flipping the wheel solved the little issue. It seems reflections and glare from the filter killed the contrast of the red channel more than it did green and blue. There is a reason manufacturers of RGB filters recommend which side to mount towards the CCD chip...

For the record, the two leftmost images were made with a monochrome ASI 120MM camera, the rightmost one with an ASI 120MC color camera.


Friday, February 14, 2014

Cold as ice


The other night my SBIG STT8300 saw first photographic light. It sat idle in its Pelican case for a few months since the day I acquired it - the duration of our move to a new house. Finally the skies briefly cleared, there was a supernova in M82. I rushed the Celestron VX mount and Takahashi FSQ106ED into the observatory (having not yet received the big equatorial). I aligned the mount using the controller and its excellent built-in polar alignment routine. Which turned out fine, till
 I incidentally hit the mount tripod in the darkness of the night. Oh well, life's too short to bother about a tad of misalignment. Exact polar alignment only happens to nerds. I hope to graduate a junior nerd in the near future.


The SBIG STT8300 is a deeply cooled monochrome CCD camera, and mine is equipped with a self-guiding filterwheel with LRGB and S2, O3 and Ha filters in front of the sensor. Self-guiding in the sense it features a small pick-up prism in front of the filter wheel to redirect some light onto a second, small CCD chip. The camera is intelligent enough to work in concert with a software program to hold the stars perfectly still, by sending control signals to the mount in near real-time correcting for bad polar alignment (if you don't exaggerate that is) or less than perfect mechanics (as is the case with any cheapish mount and some of the more expensive too).

I had installed the camera software months ago and updated the SBIG drivers for the device, I thought. I couldn't get to start Software Bisque's CCDsoft to control the camera without errors, but with the time constraints of renovating a house in mind, I just postponed further investigation of the issue. And it bit me - hard.

The sky would only be clear for a few hours on February 3, so I connected the SBIG to the FSQ106ED and using the GoTo controller steered the scope towards M81 and M82. Camera settled at a nice -20 degrees of temperature in the meantime. Didn't want to push it deeper for this short session in 2x2 binning mode of the chip. As I remembered the trouble I had with CCDsoft, I installed a test version of Maxim/DL, a very complete image capturing and processing program. Amongst other features, it allows one to program sequences, automating exposure duration, which filters to use and number of exposures for each filter. When taking test exposures I received the dreaded 'Filterwheel Error' message. I had heard about it before, and seen it myself months ago, while installing the camera.

A retry after the error worked out ok. So I launched a long sequence, lasting nearly 60 minutes hoping all would be fine. Not so. When I came back into the observatory after 30 minutes, the camera was found jammed on a filter change. Unattended photography was out of the question for the night. In the end, before the clouds rolled in, I managed to grab just enough images to produce the following picture of galaxies M81 and M82. By far not enough (color) data to make it a pretty picture, but at least the supernova is visible.


The next day I launched a support request at both SBIG and Cyanogen. They were both very helpful and asked me whether I had installed the most recent SBIG drivers. Of course I had done that, I mean the DriverCheckerUtility does that, everyone knows. What may not be known to everyone, and I certainly missed it, was the restrictions brought by the enhanced security in recent versions of Windows. I had received a message during the driver installation stating DriverCheckerUtility couldn't install a certain driver file and yada yada yada. I never paid attention to it, assuming my PC was already up to date. It wasn't. I ran the utility as Administrator to force the install. Guess what. It worked and as a side effect CCDsoft came to live. Windows, it never ever works as it should, even when it works as it should.

Did I mention the FSQ106ED does the moon too? Here's one image made a few days later, with a Canon 6D, using a Televue 4x Barlow.


Thursday, February 13, 2014

New kid in town


Tonight I aligned a brand sparkling old Celestron CGE equatorial mount, which I use temporarily, awaiting the arrival of my own 10 Micron 2000HPS mount. I have been waiting since 4 months now, but then, it has to cross the Alps, all the way from Italy. Not an easy task for any equatorial mount. Let alone it did not even leave the factory I learned the other day. Robtics in the Netherlands was so kind to offer me an interim CGE to be able to use my telescopes.

Anyway, using the drift alignment method, two hours were needed to get the Celestron aligned with the pole (where on earth does Celestron wants me to find the azimuth adjuster on this one). I like drift aligning, keeps you staring at a little dot in a cross hair eyepiece for ages. For non-astronomers: aligning an equatorial mount is the art of putting one axis exactly parallel with the earth axis. This way, one little motor can drive the mount so it makes one rotation in 24 hours, keeping the target in the field of view of the telescope, compensating for the earth rotation.

Seeing was pretty ok during the alignment process, turbulence well below average for Belgium. So, at least it would be a good night for Jupiter - I hoped. Well not exactly. When I turned the brand sparkling new Takahashi TOA150 refractor to the imaging target, seeing definitely had gone worse. Some good detail was visible on the monitor screen, but Jupiter behaved more often than not as a neurotic/elastic little ball of light. Definitely not a great start for the Takahashi planetary adventure.

Since the circumstances were not ideal to get into high resolution imaging, I compared two ASI cameras, the 120MM (monochrome) and the 120MC (direct color), being curious if the monochrome, using red, green and blue filters would teach the color camera (with Bayer grid) a lesson in grabbing detail on a planet. No sir, it did not. The color camera offered about the same resolution in the final image. So, when seeing is only average, you might as well save yourself the trouble of using a mono camera with filters. After all, direct color is a lot easier, and allows grabbing more frames in a shorter period of time. Would the mono camera without the Bayer grid overhead fare better in decent seeing? Likely. Especially if using derotation software like Winjupos to grab enough images in RGB. Will it be spectacularly different? I expect not. At least not most of the time and not in our country where moments of excellent seeing are very rare. One disadvantage of the color camera: due to the Bayer grid, it will never be ideal to use it with an IR pass filter, the most popular wavelength to compensate for bad seeing. There's no free lunch.

This was my best result of the evening. Nothing really special, but it was the first image of Jupiter with the TOA150.
It took 3 videos of 4000 images each, a selection of 4500 of the most acceptable ones (the not too blurry ones) and some post processing. Luckily automation software like AutoStakkert! or Registax does exist. There used to be a time when going through all the frames manually was necessary.

Earlier that evening, Luc Debeck, a friend of mine, was using his 12 inch Orion Optics UK Newton for the first time. He used his 120MC camera under a tad better seeing. As you can see, the color camera works very well, just as good as the monochrome. The colors of my RGB image are more saturated, but that is a matter of taste and one click of a mouse away during processing. Let's give this comparison another try under better conditions and see what it gives.


On a technical note, when capturing video with the ASI 120MC, you may opt to record in raw format. If you are using Firecapture, switch off debayering while recording. You will be able to transfer more frames per second, as debayering does cause overhead on your recording PC. Stacking software like AS!2 can do the debayering later on in the process, and gives good color results. In AS!2 choose the 'force debayering GRBG' option for best results, under the Color menu.

Getting a nice picture not always requires these kind of titanic efforts, this one was taken with my iPhone, held against the telescopes eyepiece. Very hipstamatic.